Choosing the right Bicycle Electric Motor can transform an ordinary ride into a smoother, more confident journey. However, the strongest motor is not always the best choice. A 250-watt system may suit a daily commuter on paved streets, while a higher-torque option could help riders manage steep hills or carry groceries. Your route matters.
This guide explores seven practical tips for comparing motor type, power, torque, battery compatibility, efficiency, noise, and installation support. It also considers real riding conditions, including stop-and-go traffic, rough paths, rain exposure, and limited storage space. A motor that feels impressive in a showroom may behave differently on a long incline. That lesson is easy to overlook.
Reliable decisions require more than reading advertised numbers. Check manufacturer specifications, warranty terms, service availability, and independent user feedback. Experienced riders often notice details that product pages miss, such as delayed assistance, heat buildup, or difficult cable routing. A qualified bicycle technician can also identify frame limitations before installation.
There is no perfect setup.
Even careful buyers can misjudge their needs. I once assumed higher output would guarantee a better ride, but weight and battery drain changed the experience. That mistake remains useful. It shows why comfort, maintenance, riding distance, and local support deserve equal attention. With clear priorities and realistic expectations, you can select a Bicycle Electric Motor that performs consistently, fits your bicycle, and supports years of safer, more enjoyable riding.
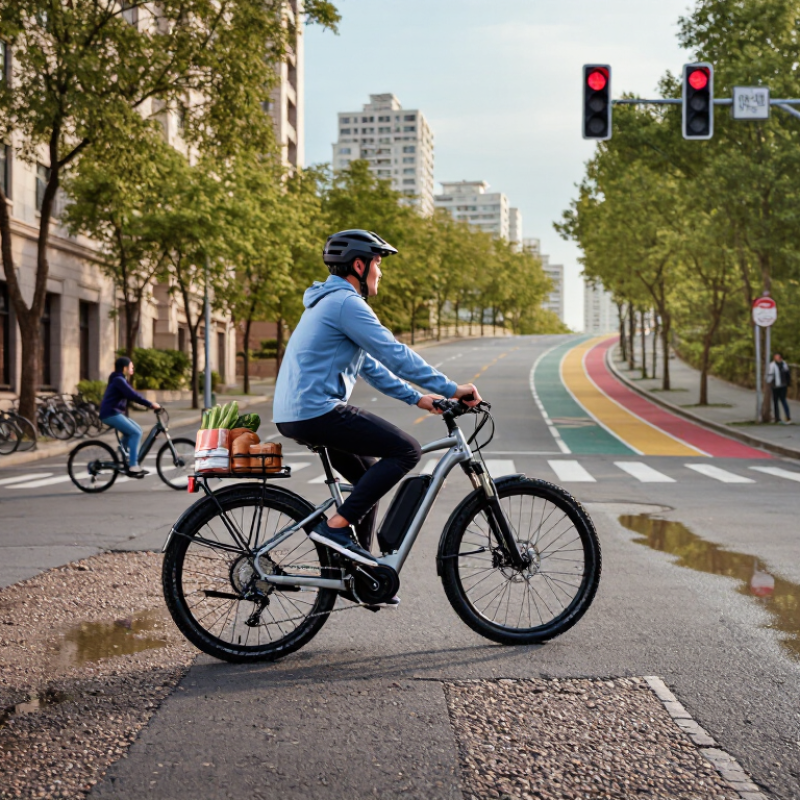
7 Tips to Choose the Right Bicycle Electric Motor
Define Your Riding Needs and Electric Motor Goals
Before choosing a bicycle electric motor, describe how and where you actually ride. Daily commuting, steep hills, gravel paths, and relaxed weekend trips require different performance. Start with distance, terrain, rider weight, cargo, and typical weather conditions.
I use a simple route test before comparing motor specifications. Record the longest climb, average distance, and places where you often stop. A motor with higher torque can help on steep roads, while moderate power may feel smoother on flat streets. Check local regulations for permitted motor ratings and assisted speeds. Legal details vary by location.
Range depends on more than battery capacity. Wind, tire pressure, temperature, riding speed, and repeated hill starts can reduce practical range. Leave a sensible reserve instead of planning around the advertised maximum. Small details matter.
Think about your preferred riding feel. A cadence-based system may start quickly, while a torque-sensing system can respond more naturally to pedal pressure. Test both if possible. Listen for unusual noise and notice whether assistance feels predictable. I once selected a motor mainly for its power rating, then found its response too abrupt in crowded streets. That mistake changed my priorities.
Consider maintenance access, replacement parts, water resistance, and installation quality. A qualified bicycle technician can check frame compatibility, axle fit, wiring, brakes, and weight balance. More power is not always better. A quieter, moderate motor may suit your route and reduce unnecessary strain on the bicycle.
Tip 1: Compare motor types before comparing prices. Hub motors sit inside a wheel and feel predictable on flat roads. Mid-drive motors power the crank, climb hills efficiently, and usually balance the bicycle better.
Tip 2: Consider your route. A rear hub motor suits commuting, while a mid-drive system handles repeated climbs more naturally.
Tip 3: Read nominal power, not only peak power. Nominal power reflects sustained output during normal riding. Peak power describes short bursts, such as starting on a slope.
Tip 4: Check torque ratings too. Higher torque helps with hills, heavy loads, and frequent stops. More power is not always better. It can increase weight and battery use.
Tip 5: Think carefully about placement. Front motors can simplify installation but may reduce grip on loose surfaces. Rear motors improve traction but can complicate wheel removal. Mid-drive motors keep weight central and work well with bicycle gears.
Tip 6: Inspect cooling and wiring protection, especially for rainy commutes.
Tip 7: Test the motor at low assistance first. Listen for harsh noise and notice delayed engagement. I once found a smooth motor easier to control than a stronger one. Specifications can miss real riding feel. Ask a qualified technician to check frame compatibility, axle spacing, brakes, and battery connections before purchase.
Choosing an electric bicycle motor starts with your route, not its advertised power. Battery capacity, measured in watt-hours (Wh), strongly affects riding range. A 500 Wh battery does not provide 500 Wh of usable energy. Hills, wind, rider weight, tire pressure, temperature, and assist level change consumption. Real roads are less forgiving.
For flat commuting, estimate your usual distance and add a safety margin of 20 to 30 percent. Many riders use roughly 8 to 20 Wh per mile, depending on speed and terrain. A 20-mile trip could therefore require 160 to 400 Wh. That range is wide, but it reflects real riding conditions. I once planned a route using the manufacturer’s maximum range and returned with very little charge. My estimate ignored strong headwinds. That mistake changed how I plan longer rides.
Track your actual battery use over several trips. Record distance, elevation, assist mode, weather, and remaining charge. This simple log gives better evidence than a single range claim. Choose a larger battery if your route includes steep climbs, heavy loads, or limited charging access. Remember that batteries gradually lose capacity, and cold weather can temporarily reduce performance. A removable battery may help apartment riders, but it also adds carrying weight. Check charging time, battery replacement support, and the motor’s efficiency at your normal speed. A smaller battery can suit short urban rides, while touring riders may need extra capacity for unexpected detours.
| Tip | Cycling Plan | Typical Conditions | Suggested Motor Output | Recommended Battery | Estimated Assist Range | Selection Guidance |
|---|---|---|---|---|---|---|
| 1 | Short urban trips | Flat roads, frequent stops, 5–15 km per ride | 250–350 W nominal | 250–400 Wh | 25–50 km | Choose a compact, efficient motor with smooth starting assistance. A smaller battery can reduce bicycle weight and charging time. |
| 2 | Daily commuting | Mixed surfaces, moderate traffic, 15–35 km per ride | 350–500 W nominal | 400–600 Wh | 40–75 km | Prioritize dependable thermal management, a torque sensor, and a removable battery if charging is not available at work. |
| 3 | Long recreational rides | Paved routes, rolling terrain, 40–80 km per ride | 350–500 W nominal | 500–750 Wh | 55–100 km | Match battery capacity to the longest planned ride, not the average ride. Efficient support at lower assist levels helps extend range. |
| 4 | Hilly commuting | Repeated climbs, descents, 15–40 km per ride | 500–750 W nominal | 500–750 Wh | 35–75 km | Look for strong low-speed torque, multiple assist levels, and adequate controller cooling. Climbing uses considerably more energy than flat riding. |
| 5 | Cargo or child transport | Added load, frequent starts, flat or moderate hills | 500–750 W nominal | 600–900 Wh | 30–70 km | Use a motor and frame system designed for the total loaded weight. Confirm the bicycle’s rated payload and local power regulations before purchase. |
| 6 | Mixed paved and light gravel routes | Uneven surfaces, moderate gradients, 25–60 km per ride | 350–500 W nominal | 500–750 Wh | 45–85 km | Select sealed components, controlled torque delivery, and tires suited to the route. More motor power does not replace appropriate traction and gearing. |
| 7 | Long-distance or remote touring | Long stages, hills, limited charging access, 60–120 km per ride | 350–750 W nominal | 750–1,000 Wh or a spare battery | 60–130 km | Favor battery capacity, serviceability, and accurate battery-state information. Carrying a spare battery may be more practical than using a very powerful motor. |
Measure your wheel diameter, dropout width, and axle type carefully. Confirm that the motor matches your bicycle frame and wheel design. Check the battery voltage and controller requirements, too. A small mismatch can cause poor performance or unsafe mounting.
I once assumed a standard axle would fit. It did not. The extra adapter changed the wheel position and required more adjustment.
Choose a motor system with reliable brake cutoffs, thermal protection, and secure wiring. The battery should sit firmly inside a protective enclosure. Inspect connectors for tight seals, especially if you ride through rain. Make sure the bicycle has strong brakes for the added speed and weight.
Test the motor at low power first. Stop immediately if you notice heat, unusual noise, or delayed braking. These checks feel slow, but skipping one can create a serious problem.
Read the installation instructions before removing any bicycle parts. Confirm the required tools, cable lengths, torque settings, and mounting space. Some installations need a torque arm or reinforced brackets. Route cables away from tires, chains, and sharp frame edges. Leave enough room for steering movement.
After installation, tighten every fastener and inspect the wheel alignment. A qualified bicycle technician should check the finished system if anything feels uncertain. Even experienced riders can miss one loose connection.
The right bicycle electric motor should balance efficiency, maintenance, and long-term cost. Efficiency matters most on hills, heavy loads, and daily commuting. During a 15-kilometer test ride, compare battery use on flat roads and slopes. Record the battery percentage before and after each route. Small differences become expensive over many months.
Compare watt-hours per kilometer, not only motor power. Higher power can improve climbing, but it may consume energy faster. Advertised ratings can also be misleading. I once chose a motor with an impressive range claim. That estimate was wrong. Real hills, cold weather, tire pressure, and rider weight changed everything. Ask for independent test data, not just laboratory figures.
Maintenance can quietly increase ownership costs. Inspect connectors, cables, mounting bolts, and unusual noises after the first few rides. A sealed housing helps, but it does not eliminate wear. Replacement sensors, controllers, and batteries may cost more than expected. Before buying, calculate the motor, battery, charger, installation, and future labor costs. Then add a small repair allowance. A cheaper motor may need frequent adjustments. A more efficient unit can reduce charging expenses, but battery replacement remains a major cost. Check warranty terms carefully. Keep receipts. A qualified technician can also verify compatibility with your frame, brakes, and existing electrical system.
Consider distance, hills, rider weight, cargo, weather, and road surfaces. A daily commute differs from relaxed weekend riding. Record your longest climb and usual stopping points. Small details matter.
No. Higher power can improve climbing but may consume energy faster. A moderate motor may feel smoother on flat streets. More power is not always better.
Higher torque helps when starting on steep hills or carrying heavy loads. Moderate torque may feel more controlled in crowded streets. Test the motor at low power first.
Cadence sensing usually starts assistance quickly. Torque sensing responds more naturally to your pedal pressure. Try both if possible. Response quality matters more than specifications alone.
Test a familiar route, including flat roads and slopes. Record battery levels before and after riding. Wind, cold weather, tire pressure, speed, and hill starts reduce range. Keep a reserve.
Measure wheel diameter, dropout width, axle type, and frame clearance. Confirm battery voltage and controller requirements. Check cable length and mounting space. Small mismatches matter.
Look for brake cutoffs, thermal protection, sealed connectors, and secure battery mounting. Use strong brakes for added speed and weight. Keep cables away from tires, chains, and sharp edges. Test gently.
Compare watt-hours per kilometer, not motor power alone. Include the motor, battery, charger, installation, maintenance, and replacement parts. Add a small repair allowance. Advertised range may disappoint.
Ask a qualified bicycle technician to check frame fit, axle alignment, wiring, brakes, and weight balance. Seek help if anything feels uncertain. Even experienced riders can miss one loose connection.
Choosing the right Bicycle Electric Motor starts with understanding your riding goals. Decide whether you need assistance for daily commuting, steep hills, long-distance touring, or occasional leisure rides. Then compare motor types, power ratings, and placement options, considering how each choice affects performance, balance, noise, and handling. It is also important to match the battery’s capacity and expected range with your usual routes, riding frequency, terrain, and charging opportunities.
Before making a purchase, confirm that the motor and battery are compatible with your bicycle’s frame, wheel size, brakes, and control system. Review installation requirements and look for practical safety features, such as reliable braking support, secure wiring, temperature protection, and clear operating controls. Finally, evaluate efficiency, maintenance needs, replacement costs, and the total ownership expense rather than focusing only on the initial price. A well-chosen Bicycle Electric Motor should provide dependable assistance, suit your lifestyle, and remain practical to operate over time.
